Draught-proofing
The average house loses 25% of its heat due to warm air escaping from the building and being replaced by cold air - draughts. Draught-proofing is the process of sealing gaps to slow the flow of air.
Modern homes are constructed with airtightness requirements defined by Building Regs, but older homes are often extremely leaky. Fortunately, it's usually quite cheap and simple to draught-proof your home. Effective whole-house draughtproofing can usually be installed for around £100-200, far cheaper than achieving the same benefit by adding insulation.

Airflow around the house. Some ventilation is essential for keeping the air fresh and controlling damp, but too much will waste heat and increase your heating bills.
Image credit - The Open University
Identifying draughts
The first stage of draught-proofing is to identify areas where air is entering or leaving your home. The best way to do this is with an infrared thermal imaging camera which will clearly show cold areas where you have cold air entering the house.

An infrared camera can be used to detect warm patches on the outside of your home or cold patches on the inside. These are indicators of either air leakage due to draughtiness, or cold bridges due to poor construction details.
For those without the luxury of a thermal camera, you can use the list below as a checklist of areas where draughts can be a particular problem. Advice for treating the draughts in each location is given under the following subheadings.
Doors
Windows
Chimneys
Floorboards
Pipe and cable openings (boilers)
Downlighters
Keyholes and letterboxes
Loft hatches
Skirting boards
A smouldering match or incense stick producing a steady stream of smoke can also be useful for detecting gentle air currents. Or you can contact us about a thermal survey and report.
Draught-proofing doors
Windows and doors are typically less well insulated than the walls of your house, but they can also be draughty if their frames are poorly sealed, allowing air leakage around the edges. Wooden windows and doors are particularly bad for this as they shrink, swell and warp during the seasons, sometimes leading to large gaps.
Most DIY stores sell self-adhesive foam draughtproofing strips. We've found the performance of these to be poor. They become detached easily and in many cases prevent the door or window from closing properly. We’ve had more success with nailed-on seals such as Q-Lon strips. These are cut to length and pinned around the frame on the closing side. They have a flexible gasket that sits snugly against the moving part of the window or door. They only cost a few pounds each and take minutes to install. A far better solution than the self-adhesive strips.

This image shows a set of wooden French windows draught-proofed with Q-Lon strips. These compress to form an airtight seal and are more tolerant to movement in the door than self-adhesive strips
The bottom edges of doors are more difficult to seal. Q-Lon strips aren't appropriate because they would be damaged by people treading on them. Two alternatives are –
Filling the gap with silicone sealant (like the stuff you'd use to seal around your shower). You can prevent it gluing the door shut by applying a liberal coating of Vaseline to the moving surface. Be sure to leave the door at least 48 hours after applying the sealant before opening to allow it to set properly.
A brush seal. In our experience this is less effective than the method above and is only recommended where you don't have a suitable door jamb to seal against.

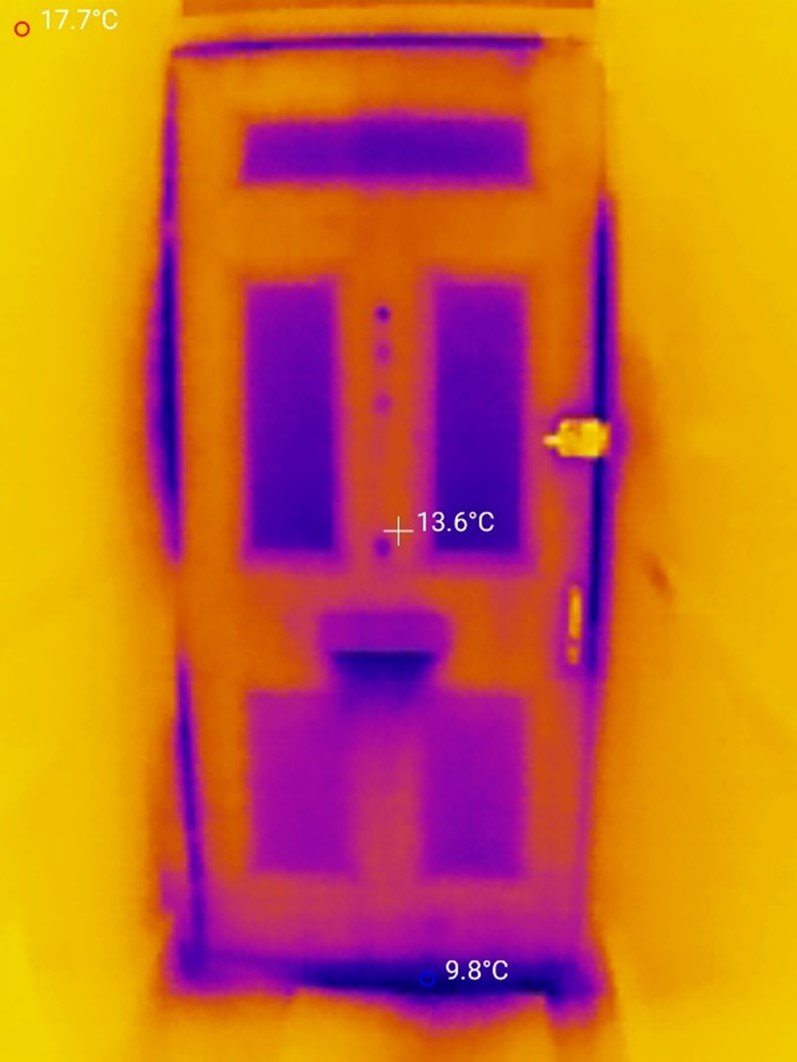
Before and after draught-proofing a front door. The cold (blue) areas around the sides and top of the door in the first image are caused by air leakage. These have disappeared in the second image after installation of Q-Lon Retro draught-proofing seals. The bottom edge has had a brush seal installed but the second image shows that this is less effective. The letterbox is the next area that could be improved.
Draught-proofing windows
Casement windows (those which swing open) can be draught-proofed in a similar manner to doors as described above, using Q-Lon strips or silicone sealant as appropriate.
Sash windows are more challenging. Because they slide rather than swing open it's more difficult to attach a seal without affecting the operation of the window. The best method is to add soft "brush pile" seals around the contact surfaces, however this is a fiddly job that involves dismantling the window. There are guides on YouTube showing how to do this, but most homeowners would need to employ a specialist which could become expensive.

Sash windows are particularly complicated to draught-proof. This image shows “brush pile” strips which seal the gaps while still alllowing the sashes to slide.
Image credit - www.renovategreen.co.uk
Secondary glazing is another good option, especially if you’re also adding wall insulation. But this is also expensive.
A simpler method is to stick Sellotape over the gaps during the winter, and then remove it during the summer. This can be surprisingly effective at reducing the draughts and, if done well, the clear tape is almost invisible.
Draught-proofing chimneys
Although you'll rarely feel cold draughts coming down chimneys (because warm air rises up the chimney, rather than cold air being drawn down) you can lose considerable amounts of heat through the 'stack effect'. Let's not forget this was the original purpose of the chimney!
Unless a fireplace is actively used you can seal the chimney to save energy. There are a few ways to do this -
If you have access to the roof, the best method is to permanently cap the chimney.
Fit a "chimney balloon". As the name suggests, these are inflatable bags which can be fitted up the chimney before being pumped full of air. If positioned correctly they will seal the chimney flue. Bear in mind that they may need topping-up with air occasionally.
Block the chimney with wool insulation. This won’t completely seal the chimney but should slow down the airflow and might be good compromise if you want to retain a bit of ventilation.
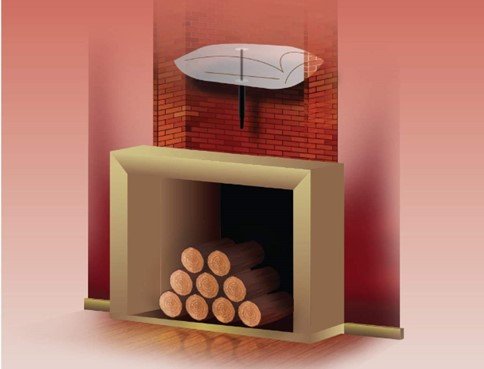
A chimney balloon used to prevent warm air leaking out of a chimney.
Draught-proofing floorboards
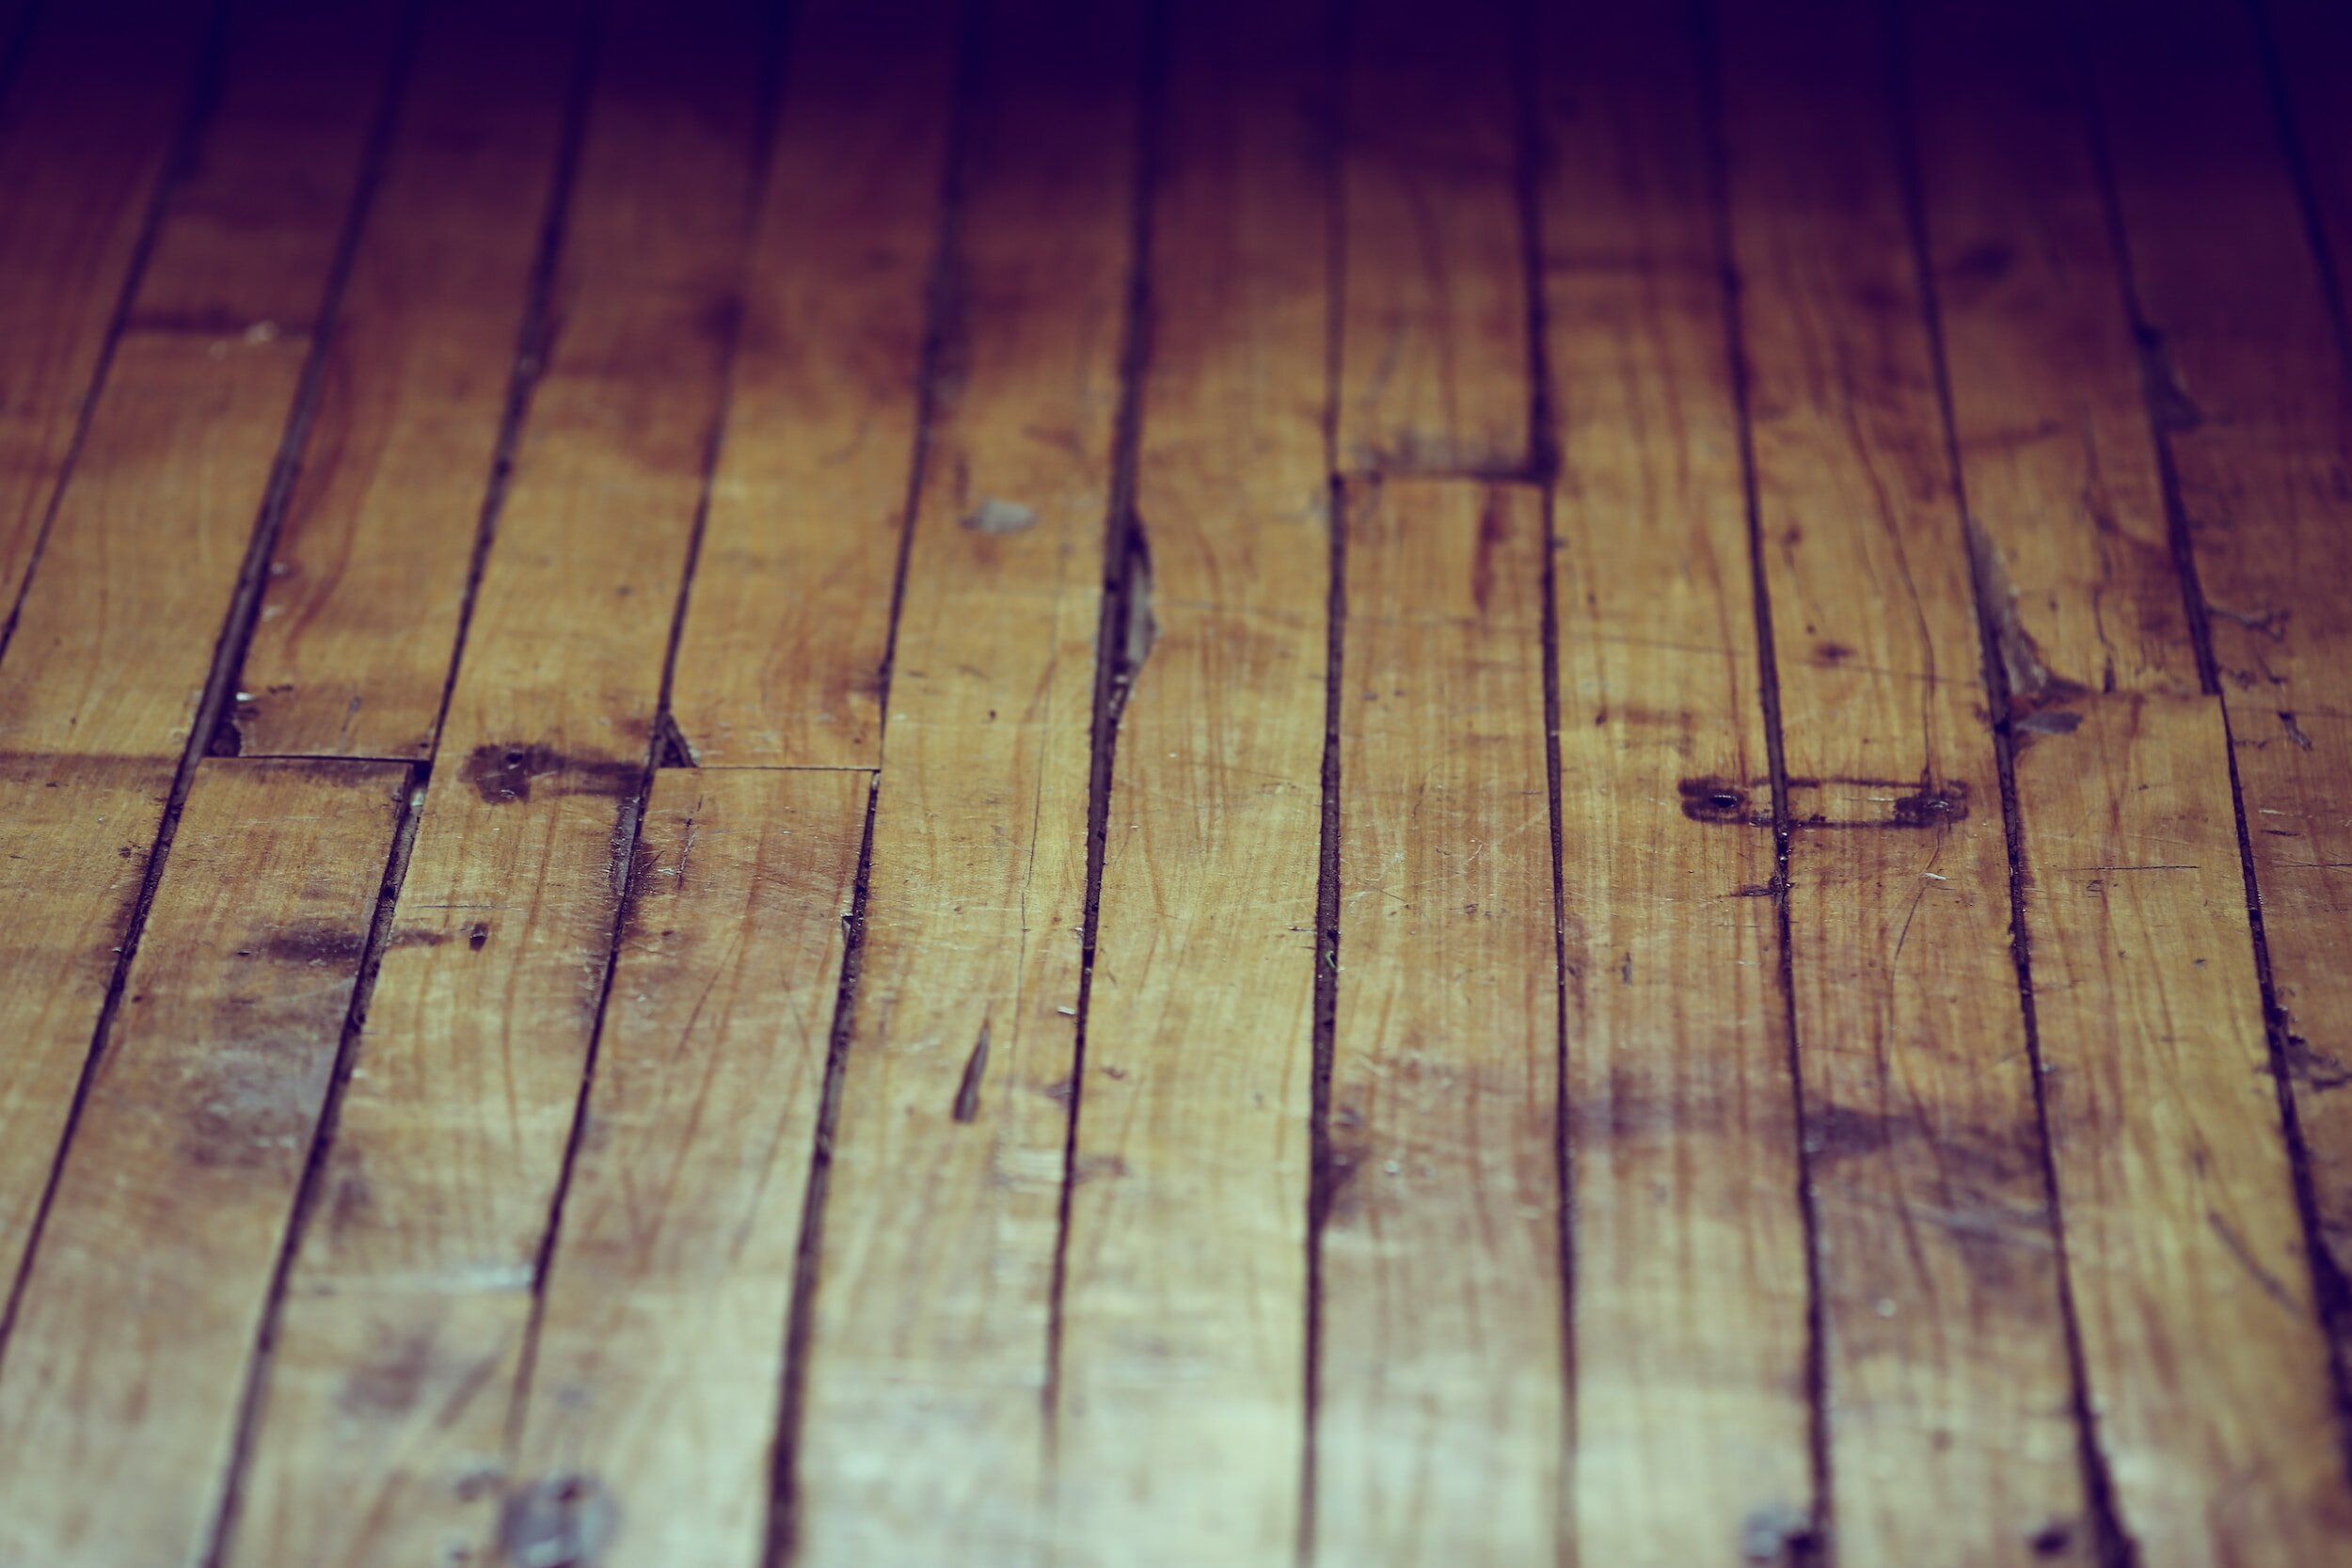
If you have an unheated space below your ground floor (either a full basement or the void beneath a suspended floor) then you need to consider the ground floor as an external surface where you can lose heat. Victorian houses were commonly built with suspended timber floors which can allow significant leakage of cold air. The recent trend for removing carpets to expose the floorboards has exacerbated this effect because cold air can flow unrestricted through the gaps between the boards.
If you suffer from this issue, you can purchase sealants such as DraughtEx to seal the gaps between the floorboards. This is only a partial solution however since it might reduce the draughtiness but the floorboards are still a poor insulator and will remain cold underfoot.
The best retrofit measure is to add under-floor insulation. This generally requires the floorboards to be removed, and some form of insulation to be installed between the joists, before re-attaching the floorboards or replacing them with modern plywood sheets. This solution will fix the draughts and provide a well-insulated ground floor which feels warmer underfoot.
Draught-proofing pipe and cable openings
Every pipe and cable that enters your home passes through a wall, floor or ceiling at some point. This includes gas, electricity, water, telecoms, etc. Each of these is a potential source of draughts if not properly sealed. A particular problem area is around the boiler which is usually connected to all sorts of pipes and cables (water, gas and electricity).

Typical space around a gas boiler - showing wide unsealed gaps around pipes and at the bottom edge of the wall. We could feel cold air rushing into the home through these openings.
The ideal way to seal these service penetrations is with an airtight "grommet" built into the wall construction. For retrofit situations, adding grommets usually isn’t practical. Instead, we can use gun-applied silicone sealant or decorator’s caulk for small gaps, or expanding foam for larger gaps. For very large gaps you may wish to fill them with insulation before sealing.

Installing an airtight “grommit” in a wall. This is the gold standard of airtightness for piping, but is usually impractical for retrofit draught-proofing projects. Silicone sealant or decorator’s caulk will do a perfectly good job for a fraction of the cost.
The image below shows three service penetrations in the external wall behind a boiler. These 150mm diameter holes were cut for the adjoining bathroom extractor fan (bottom), a tumble dryer vent (centre), and the utility room extractor fan (top). No tumble dryer was connected so the middle hole was completely open when we found it! We sealed it with some wool insulation in the hole and self-adhesive tape over the inside face. The gaps around the bottom pipe were sealed with Soudal 'Genius Gun' expanding foam which costs a few pounds from any DIY store.
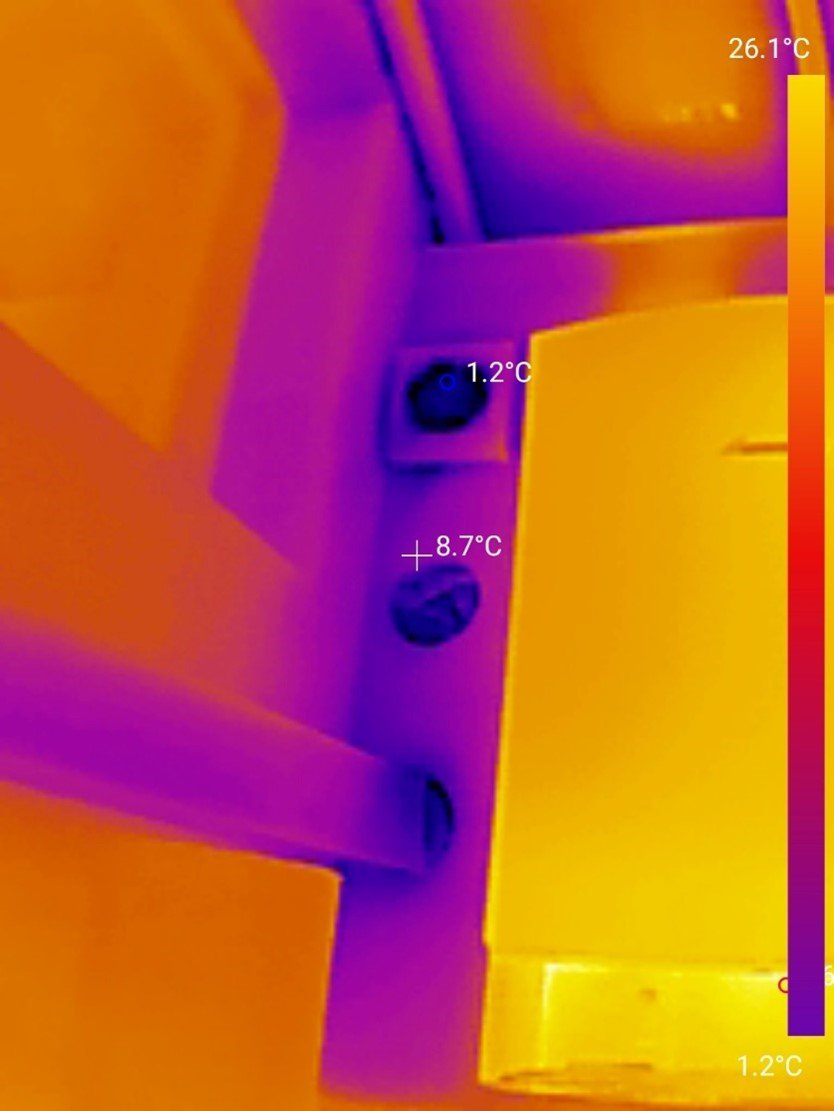
Wide, unsealed openings in an external wall. The central hole was for a tumble dryer that no longer existed, and was completely open - equivalent to having a window wide open throughout the winter!
Draught-proofing downlighters
Every downlighter in your home requires a hole to be cut in the ceiling. If the units aren’t airtight (they usually aren’t) they can collectively allow large amounts of warm air to flow into your attic or floor spaces.
There are two ways to draught-proof downlighters -
If you have access to the attic above, the down-lights can be covered with hoods such as “Loft Lids” and then covered with wool insulation.
If you can’t access the space above, the best thing you can do is to use IP65-rated downlighters. This is a standard which means the units will be dust-proof and water resistant, meaning they’s usually much better sealed than the usual units.

Sealing downlighters from above using covers. This prevents warm air escaping into the attic. For more information see our instructions for loft insulation.
Draught-proofing keyholes and letterboxes
Keyholes are small but easily sealed. For unused keyholes (or those used from one side only) you can seal with a little strip of self-adhesive tape. Sellotape will be almost invisible and we've found it to be surprisingly durable, even when stuck on the outside.
For keyholes that are regularly used the best option is a little swing flap which can be screwed or glued onto the door with epoxy adhesive.
Letterboxes with flaps and brush seals are available and are worth considering if your current letterbox is a source of draughts.
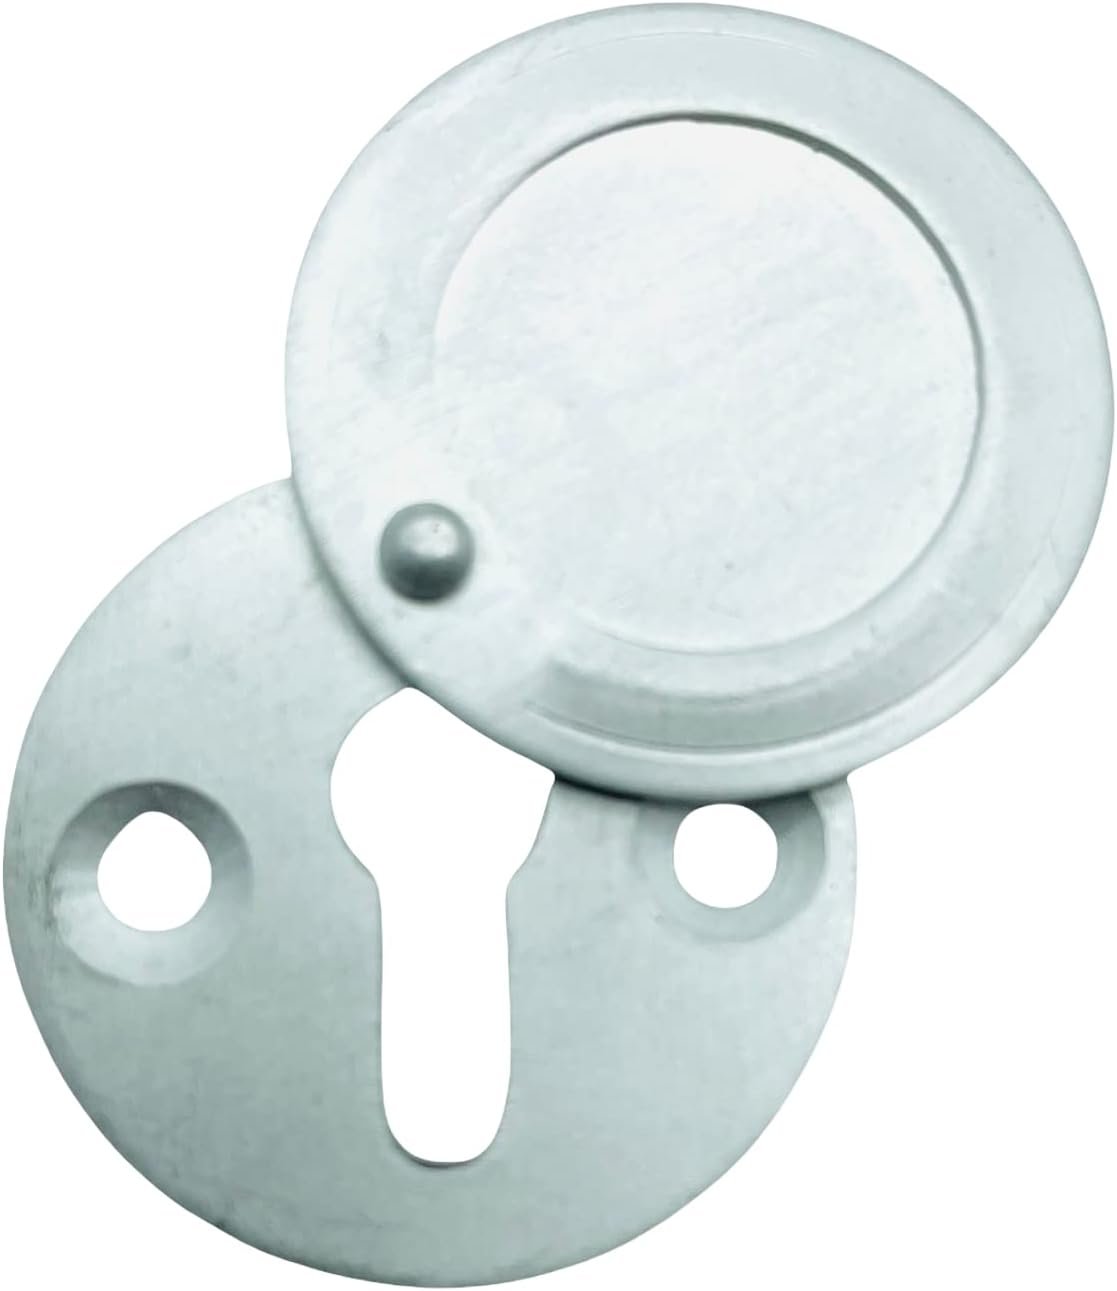
Keyholes and letterboxes are usually easy to seal using flaps like this one.
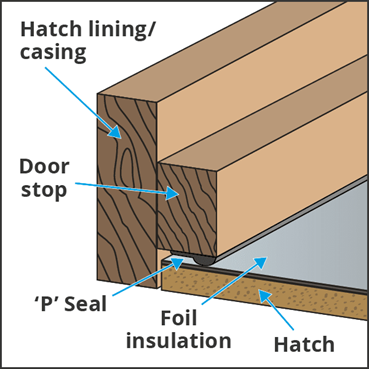
Draught-proofing loft hatches
If your loft is unheated, a poorly sealed loft hatch may let warm air escape. Around the edges of loft hatches is a location where the DIY store self-adhesive foam draughtproofing strips may be suitable.
Draught-proofing skirting boards
Unsealed skirting boards are another common path for cold air to enter your home. A thermal camera survey is the best way to determine whether you have draughts coming underneath the skirting boards. If so, it is usually quite easy to seal the gaps using a bead of decorator's caulk. Note that you may need to seal both top and bottom edges of the skirting boards.

Sealing skirting boards top and bottom with decorator’s caulk is a quick and effective method of preventing draughts. Be sure to check window sills and frames while you’re at it.
Tool Kit